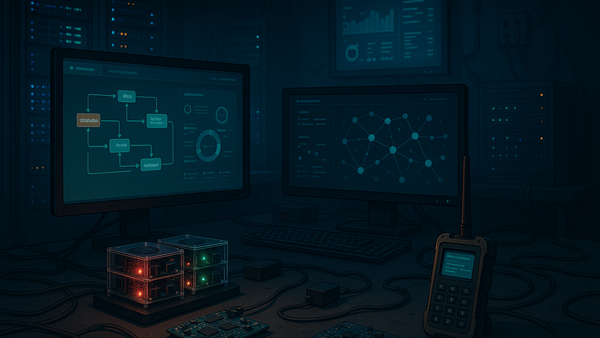
Home Lab Network Setup: A Beginner's Guide to Success
Unlock the secrets of home lab network setup with our comprehensive guide! Learn IP addressing, VLAN benefits, firewall configurations, and VPN security for beginners.


Home Lab Network Setup: The Ultimate Guide for Beginners
Estimated reading time: 17 minutes
Key Takeaways
- A clear plan and network diagram save time and prevent common mistakes.
- Proper IP addressing and VLAN segmentation create an organized, secure lab environment.
- Firewalls and DNS/reverse proxy configurations centralize control and improve security.
- VPN and dynamic DNS ensure safe, reliable remote access.
Table of Contents
- planning-your-home-lab-network-setup
- ip-addressing-strategies
- vlan-setup-managed-switch-configuration
- firewall-basic-network-security
- internal-dns-reverse-proxy-configuration
- remote-access-vpn
- conclusion
1. Planning Your Home Lab Network Setup
Before purchasing equipment or configuring anything, you need a solid plan. As Cisco notes, "A well-documented network plan can reduce deployment time by up to 30%," making this step crucial for success.
Defining Objectives & Requirements
Start by listing what you want to accomplish with your home lab. Common services include:
- Virtualization host (Proxmox or ESXi)
- Container platform (Docker with Portainer)
- Network-attached storage (NAS)
- Firewall (pfSense or OPNsense)
- DNS server (Pi-hole)
- Reverse proxy (Nginx, Traefik, or Caddy)
- VPN endpoint for remote access
Once you've identified your needs, determine hardware requirements:
- CPU: Modern multi-core processor (4+ cores recommended)
- RAM: 16-32GB minimum (more for heavy virtualization)
- Storage: SSD for OS/VMs, HDD for data storage
- Network: At least two NICs (Network Interface Cards) for proper network separation
- Switch: Managed switch for VLAN support
Designing Your Network Diagram
According to the r/homelab community consensus, "Successful labs begin with clear objectives and a visual topology—sketch it before you click anything." This advice is invaluable.
Use tools like draw.io, Lucidchart, or Microsoft Visio to create your network diagram. Your diagram should include:
- Internet connection and edge router
- VLAN interfaces and their purpose
- Managed switch connections
- Server hosts and their placement
- DMZ vs. internal network segregation
- Public vs. private IP ranges
A standard legend might include:
| Symbol | Meaning |
|---|---|
| 🌐 | Internet/WAN |
| 🔒 | Firewall |
| 🔄 | Switch |
| 🖥️ | Server |
| 📱 | Client device |
Start with a simple numbering convention for your VLANs:
- VLAN 10: Management interfaces
- VLAN 20: Server network
- VLAN 30: IoT devices
- VLAN 40: Guest network
Having a clear diagram helps tremendously when troubleshooting issues later and serves as documentation for your setup.
2. IP Addressing Strategies
Proper IP addressing prevents conflicts and makes your home lab network manageable as it grows.
Subnetting Basics for Home Labs
Subnetting your home lab network creates logical separation between different types of devices and services. When planning your IP addressing, you'll need to understand CIDR notation.
CIDR (Classless Inter-Domain Routing) notation looks like this: 192.168.10.0/24. The "/24" indicates the subnet mask, which in this case yields 254 usable host addresses (192.168.10.1 through 192.168.10.254).
For a home lab, you can carve your network into different sized subnets:
- /24 networks (256 addresses) for larger segments like servers or clients
- /28 networks (16 addresses) for management interfaces
- /30 networks (4 addresses) for point-to-point links
According to RFC 1918, these private IP ranges are available for your use:
- 10.0.0.0/8 (10.0.0.0 to 10.255.255.255)
- 172.16.0.0/12 (172.16.0.0 to 172.31.255.255)
- 192.168.0.0/16 (192.168.0.0 to 192.168.255.255)
A sample subnetting scheme might look like this:
| Subnet | VLAN | Purpose |
|---|---|---|
| 10.0.10.0/24 | 10 | Management |
| 10.0.20.0/24 | 20 | Servers |
| 10.0.30.0/24 | 30 | IoT Devices |
| 10.0.40.0/24 | 40 | Guest Network |
Static IP vs DHCP in Your Lab
When it comes to assigning IP addresses, you have two primary options:
Static IP Assignment
- Pros: Predictable addressing, easier port forwarding, no changes over time
- Cons: Manual configuration required, potential for human error
DHCP Assignment
- Pros: Automatic configuration, central management, easier to scale
- Cons: Addresses can change (unless using reservations)
According to Aruba Networks research, using DHCP reservations reduces IP conflicts by approximately 90% in small networks, making it an excellent compromise approach.
For critical infrastructure like firewalls, switches, and servers, consider using DHCP reservations, which provide the benefits of both approaches. In pfSense, you can configure DHCP reservations by:
- Going to Services > DHCP Server
- Scrolling to "DHCP Static Mappings"
- Adding entries with MAC addresses and desired IP addresses
This ensures devices always get the same IP while maintaining central management.
3. VLAN Setup & Managed Switch Configuration
Virtual LANs (VLANs) are essential for creating logical separation in your home lab network.
Benefits of VLANs in Home Lab
VLANs provide several important advantages for your home lab:
- Security isolation: Prevents lateral movement between networks if one segment is compromised
- Broadcast domain control: Reduces unnecessary traffic and improves performance
- Logical grouping: Keeps related devices together regardless of physical location
- Traffic management: Allows for different quality of service (QoS) rules per network segment
- Simplified network management: Makes rule creation and troubleshooting easier
According to Cisco documentation, "VLANs enhance security by isolating broadcast domains," which is especially important when experimenting with different services. Gartner research indicates that network segmentation reduces internal attack surface by 80%, making VLANs a security best practice.
Configuring VLANs on a Managed Switch
To implement VLANs, you'll need a managed switch. Popular options include Ubiquiti UniFi switches, Cisco Small Business series, TP-Link managed switches, and Netgear ProSafe switches.
Here's how to configure VLANs on a Ubiquiti UniFi Switch via the CLI:
config switch-vlan create 10 —name "mgmt"
config switch-port trunk add 1 t10
config switch-port set 2 port-mode access t20
If you're using the web interface, the process typically involves:
- Defining your VLANs (IDs and names)
- Configuring trunk ports (ports that carry multiple VLANs)
- Setting access ports (ports assigned to a single VLAN)
Understanding port tagging is crucial:
- Tagged ports: Carry traffic from multiple VLANs (typically connections to other switches or your firewall/router)
- Untagged ports: Assigned to a single VLAN (typically end-device connections)
For example, you might configure:
| Port | Mode | VLANs | Purpose |
|---|---|---|---|
| 1 | Trunk | 10,20,30,40 (Tagged) | Connection to firewall |
| 2-5 | Access | 10 (Untagged) | Management devices |
| 6-10 | Access | 20 (Untagged) | Server connections |
| 11-15 | Access | 30 (Untagged) | IoT devices |
| 16-20 | Access | 40 (Untagged) | Guest devices |
This configuration ensures traffic stays within its intended network segment, improving both security and performance.
4. Firewall & Basic Network Security
A properly configured firewall is the cornerstone of your home lab network security.
pfSense & OPNsense Home Lab Setup
Both pfSense and OPNsense are excellent open-source firewall solutions for home labs. According to Netgate performance benchmarks, pfSense can handle 1 Gbps throughput on commodity hardware, making it suitable for most home lab setups.
To get started:
- Download the ISO for your chosen firewall (pfSense or OPNsense)
- Decide between VM installation or bare-metal:
- VM: Easier to back up, but slightly higher latency
- Bare-metal: Better performance, but dedicated hardware required
For a VM installation on Proxmox:
- Create a new VM with at least 2 network interfaces
- Set CPU type to host
- Allocate 2GB+ RAM and 20GB+ storage
- Mount the ISO and install the firewall
Once installed, follow the initial wizard to:
- Set WAN and LAN interfaces
- Configure WAN connectivity (typically DHCP from your ISP)
- Set a strong admin password
- Choose your time zone
- Configure LAN IP (typically your management subnet, like 10.0.10.1/24)
Proxmox Firewall Rules & Best Practices
If you're using Proxmox as your virtualization platform, its built-in firewall provides an additional layer of security.
To enable the Proxmox host firewall:
- Navigate to Datacenter > Firewall
- Click "Options" and set "Firewall" to "Yes"
- Create security groups for different VM types
For example, to create a web server group:
pve-firewall group add VM-WEB --rule "IN ACCEPT --proto tcp --dport 80"
pve-firewall group add VM-WEB --rule "IN ACCEPT --proto tcp --dport 443"
Apply this group to relevant VMs to ensure consistent policy enforcement.
Securing Your Lab: Basic Network Security Tips
As the Netgate blog notes, "A dedicated firewall VM with proper rules is your lab's first line of defense." Implement these essential security practices:
- Change default passwords for all devices and interfaces
- Disable unused services to reduce attack surface
- Enforce HTTPS for all admin interfaces
- Limit SSH access to your management VLAN only
- Enable two-factor authentication where possible
- Create firewall rule sets that follow the principle of least privilege
- Update firmware and software regularly
- Back up configurations so you can quickly recover if needed
A basic secure rule set includes:
- Allow established and related connections
- Allow LAN to WAN (internet)
- Block WAN to LAN (unless specifically allowed)
- Allow management VLAN to access admin interfaces
- Block inter-VLAN traffic except where needed
These fundamentals will keep your lab secure while you experiment with different configurations.
5. Internal DNS & Reverse Proxy Configuration
Proper DNS and reverse proxies make accessing your lab services simpler and more secure.
Pi-hole as Local DNS Server
Pi-hole serves as both an ad-blocker and a local DNS server for your home lab. According to Pi-hole documentation, it can block up to 80% of ad-related DNS queries, improving both security and browsing experience.
Installing Pi-hole is straightforward:
Option 1: Direct installation on Debian/Ubuntu:
curl -sSL https://install.pi-hole.net | bash
Option 2: Docker installation:
version: "3"
services:
  pihole:
    container_name: pihole
    image: pihole/pihole:latest
    ports:
      - "53:53/tcp"
      - "53:53/udp"
      - "80:80/tcp"
    environment:
      TZ: 'America/New_York'
      WEBPASSWORD: 'your-password-here'
    volumes:
      - './etc-pihole:/etc/pihole'
      - './etc-dnsmasq.d:/etc/dnsmasq.d'
    restart: unless-stopped
Once installed, access the web interface (typically http://pi-hole.ip.address/admin) to:
- Set up custom DNS records for internal services
- Configure upstream DNS providers
- Manage blocklists
- Review query logs and statistics
Custom DNS records allow you to access services by name rather than IP address—for example, typing "proxmox.lab" instead of "10.0.20.5".
Introduction to Reverse Proxy
A reverse proxy serves as a central gateway to your various web services. As noted by Let's Encrypt, "Reverse proxies prevent direct access to origin servers, reducing attack surface."
Key benefits include:
- Single entry point for multiple web services
- TLS termination for encrypted connections
- Host-based routing using domain names
- Load balancing across multiple backend servers
- Simplified certificate management
Instead of exposing multiple services on different ports (e.g., Proxmox on 8006, Portainer on 9000), a reverse proxy allows you to access everything through standard ports (80/443) using different domain names.
Nginx, Traefik & Caddy Setup
Three popular reverse proxy solutions for home labs are Nginx, Traefik, and Caddy. Each has its strengths:
Nginx Proxy Manager offers a user-friendly web interface. Here's a quick Docker Compose setup:
version: '3'
services:
  nginx-proxy-manager:
    image: jc21/nginx-proxy-manager:latest
    ports:
      - "80:80"
      - "443:443"
      - "81:81"  # Admin interface
    volumes:
      - ./data:/data
      - ./letsencrypt:/etc/letsencrypt
    restart: unless-stopped
After installation, access the admin interface at http://your-ip:81 and log in with:
- Email: [email protected]
- Password: changeme
Then set up proxy hosts for your services, such as proxmox.lab → 10.0.20.5:8006.
Traefik excels at container integration with auto-discovery:
version: '3'
services:
  traefik:
    image: traefik:latest
    ports:
      - "80:80"
      - "443:443"
      - "8080:8080"  # Dashboard
    volumes:
      - /var/run/docker.sock:/var/run/docker.sock
      - ./traefik.yaml:/etc/traefik/traefik.yaml
    restart: unless-stopped
A basic traefik.yaml configuration:
api:
  dashboard: true

entryPoints:
  web:
    address: ":80"
  websecure:
    address: ":443"

providers:
  docker:
    exposedByDefault: false
Caddy offers the simplest configuration with automatic HTTPS:
example.lab {
    reverse_proxy 10.0.20.10:80
}

proxmox.lab {
    reverse_proxy 10.0.20.5:8006
}
This Caddyfile automatically obtains and renews certificates for your domains, making Caddy particularly user-friendly for beginners.
6. Remote Access & VPN
Secure remote access is essential for managing your home lab from anywhere.
VPN for Home Lab Access
A VPN (Virtual Private Network) creates an encrypted tunnel between your remote device and home network. Two popular options are OpenVPN and WireGuard.
According to WireGuard performance benchmarks, it's up to 3x faster than OpenVPN on small devices, making it an excellent choice for home labs. As WireGuard documentation notes, "WireGuard's simplicity makes it ideal for home labs."
To set up WireGuard on pfSense:
- Install the WireGuard package from System > Package Manager
- Navigate to VPN > WireGuard
- Create a new tunnel with these settings:
[Interface] Address = 10.0.50.1/24 PrivateKey = <server_key> ListenPort = 51820 - Add peers (clients) with their public keys
- Create firewall rules to allow VPN traffic
For clients, download the WireGuard app (available for Windows, macOS, iOS, Android, and Linux) and import your configuration.
Planning for Remote Home Lab Access
Several additional components make remote access more reliable:
Dynamic DNS
Since most home internet connections don't have static IP addresses, set up a dynamic DNS service to maintain a consistent domain name. Popular options include:
- DuckDNS (free)
- No-IP (free and paid tiers)
- Cloudflare (if you own a domain)
For DuckDNS, use ddclient with a configuration like:
use=web, web=checkip.dyndns.org
protocol=duckdns
server=www.duckdns.org
login=your-token
password=
your-domain.duckdns.org
Security Considerations
Enhance your VPN security with:
- Port knocking or port restrictions to hide your VPN port from scans
- Multi-factor authentication for VPN logins
- Split tunneling to route only lab traffic through VPN
- Fail2ban to block repeated login attempts
- Regular client audits to review who has access
By combining VPN with these security measures, you'll have reliable, secure access to your lab from anywhere.
Conclusion
Building a proper home lab network setup is a rewarding journey that teaches practical networking skills while providing a platform for experimentation.
Key Takeaways
- A clear plan and network diagram save time and prevent common mistakes.
- Proper IP addressing and VLAN segmentation create an organized, secure lab environment.
- Firewalls and DNS/reverse proxy configurations centralize control and improve security.
- VPN and dynamic DNS ensure safe, reliable remote access.
By following this home lab network setup roadmap, you'll build a resilient and scalable environment that grows with your needs and skills. The foundation you've created—from planning to implementation—provides a professional-grade lab that mimics enterprise environments while fitting your home and budget.
Remember that your lab will evolve over time. Start small, document changes, and gradually expand as you become comfortable with each component. The skills you develop maintaining your home lab translate directly to professional environments, making this investment valuable for both learning and career advancement.
Ready to take your home lab to the next level? Try our interactive subnet calculator, download our Home Lab Network Checklist PDF, or join our community forum to share your setup and get answers to your specific questions.
Happy labbing!